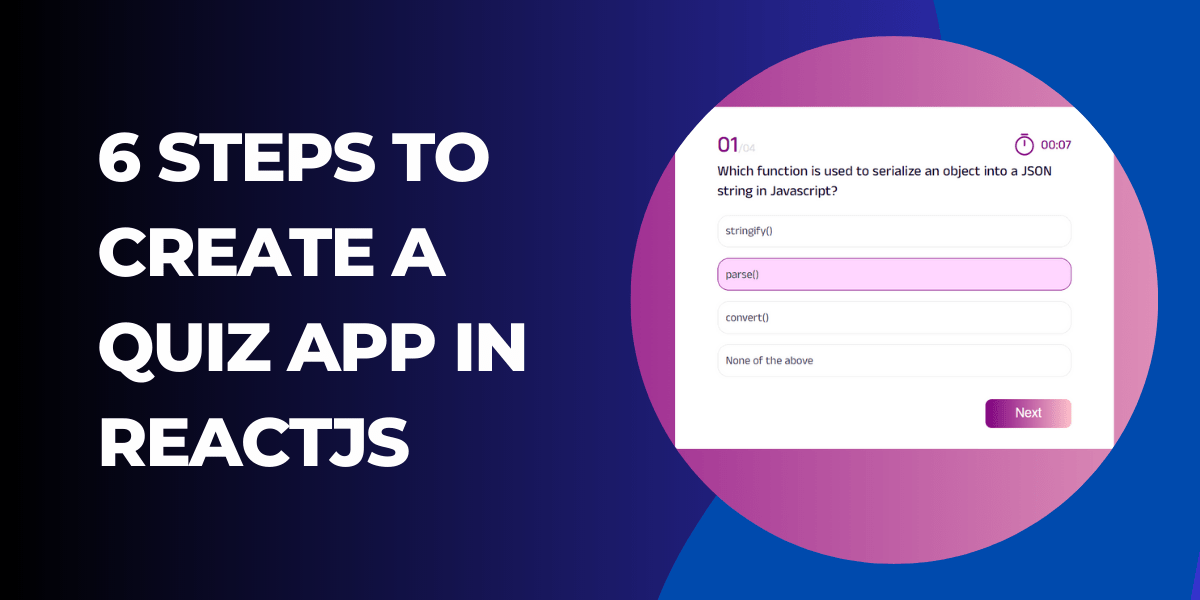
You might make a ReactJS quiz app if you're starting in web development or taking a basic-level course. One of any language's most fundamental projects is this one. You can learn so many concepts while building quiz app in Reactjs.
- How
useStateworks in ReactJS while keep track ofactive questions,selected answerandresult. - How to conditionally add classes to highlight the answer user has selected.
- Catching edge cases, like in case of last question we will change button title from Next to Finish and display the result to user. Add leading zero if question number is less than 10.
Understand The Logic Behind The Quiz App
To understand how quiz app works, we need to understand how following logic works.
- We have to track question number.
- Function runs on clicking next button.
- We have to keep track of all the answers selected by user, to calculate the score to show on result screen.
- Quiz question file, the same structure can be used in
APIs.
Quiz Questions Javascript File
This is how we structured the quiz questions, the same format can be used for APIs.
1// Question Types
2// 1. MCQs | Multiple Choice | single
3
4export const quiz = {
5 topic: 'Javascript',
6 level: 'Beginner',
7 totalQuestions: 4,
8 perQuestionScore: 5,
9 questions: [
10 {
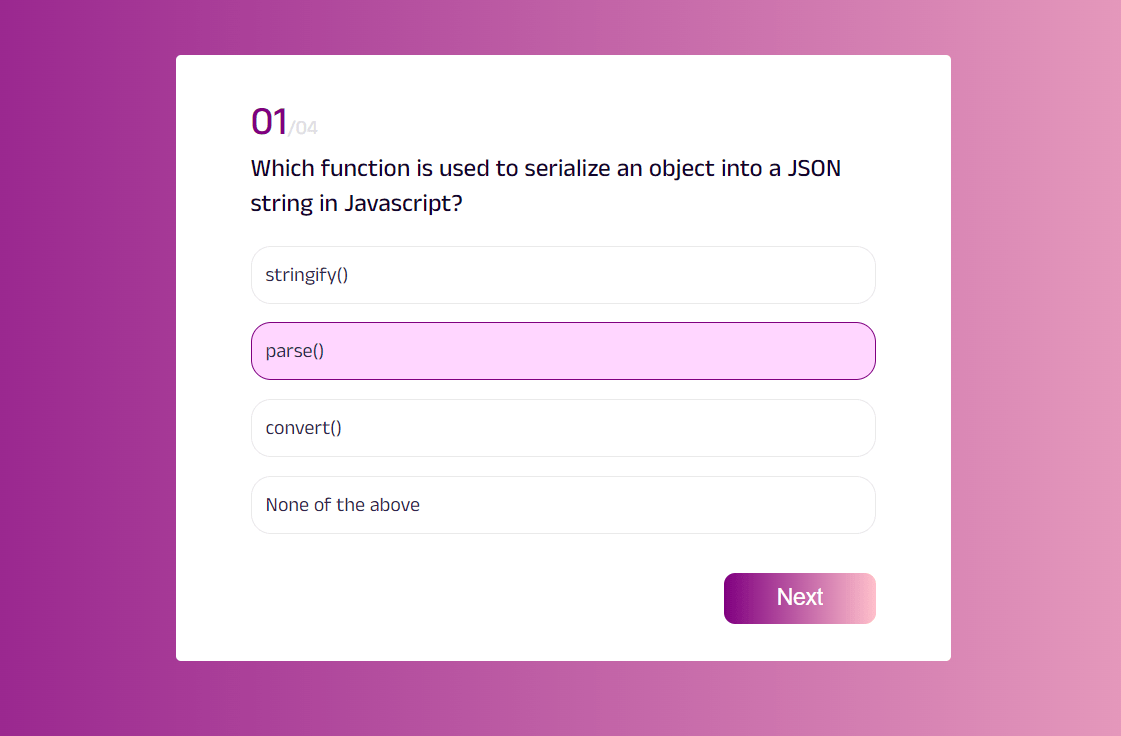
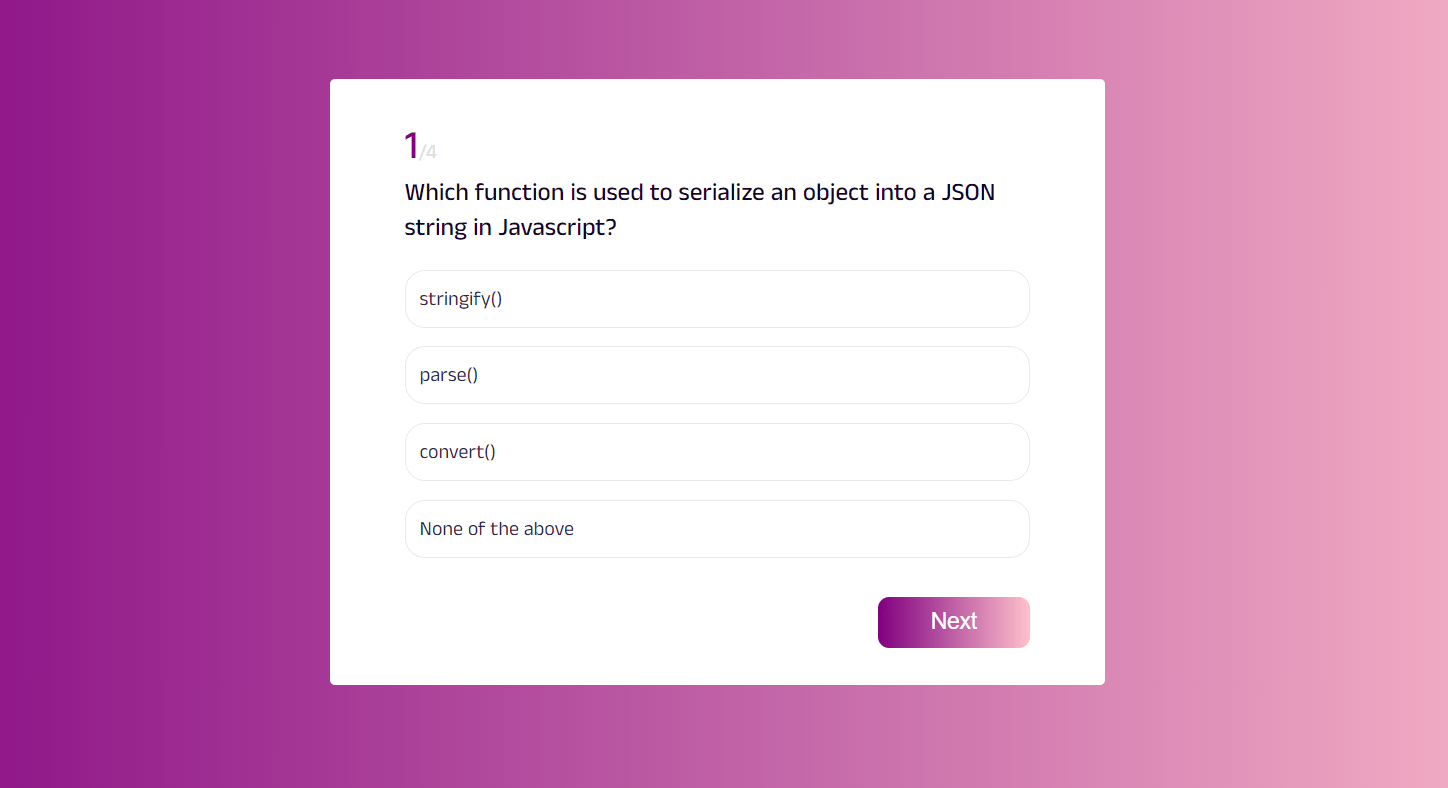
11 question: 'Which function is used to serialize an object into a JSON string in Javascript?',
12 choices: ['stringify()', 'parse()', 'convert()', 'None of the above'],
13 type: 'MCQs',
14 correctAnswer: 'stringify()',
15 },
16 {
17 question: 'Which of the following keywords is used to define a variable in Javascript?',
18 choices: ['var', 'let', 'var and let', 'None of the above'],
19 type: 'MCQs',
20 correctAnswer: 'var and let',
21 },
22 {
23 question:
24 'Which of the following methods can be used to display data in some form using Javascript?',
25 choices: ['document.write()', 'console.log()', 'window.alert', 'All of the above'],
26 type: 'MCQs',
27 correctAnswer: 'All of the above',
28 },
29 {
30 question: 'How can a datatype be declared to be a constant type?',
31 choices: ['const', 'var', 'let', 'constant'],
32 type: 'MCQs',
33 correctAnswer: 'const',
34 },
35 ],
36}The above questions have been taken from interviewbit.
Quiz Question Structure Explanation
In my observation, all quiz APIs have almost the same structure. question, choices, correct answers, and question type. These are the main keys.
This is the design we are going to implement, Codepen demo is also available at the end of the article.
Step-by-Step Quiz App Development
So, from here, we will see code blocks for each step. Let us get started.
Step 01: ReactJS Quiz Component
Quiz component will mainly have 3 elements for quiz UI
- Question
- Answers
- Next Button
Lets’s start writing quiz component in Reactjs
We have defined 3 states:
activeQuestions, keep track of current questionselectedAnswer, which answer user has selectedresult, to calculate totalscores,correctAnswers,wrongAnswers.
1const Quiz = () => {
2  const [activeQuestion, setActiveQuestion] = useState(0)
3  const [selectedAnswer, setSelectedAnswer] = useState('')
4  const [result, setResult] = useState({
5    score: 0,
6    correctAnswers: 0,
7    wrongAnswers: 0,
8  })
9  return <h1>Quiz</h1>
10}
11
12export default Quiz
Step 02: Getting Questions From Question File
In this step, our goal is to display the question from the question file on the screen. Since the question file is an array, we can use an index to access particular array item (question). The code to get the first question is listed below.
Get first question
1const Quiz = () => {
2  const [activeQuestion, setActiveQuestion] = useState(0)
3  const [selectedAnswer, setSelectedAnswer] = useState('')
4
5  const { questions } = quiz
6
7  return (
8    <div>
9      <h1>Quiz</h1>
10      <h2>{questions[activeQuestion].question}</p>
11    </div>
12  )
13}
14
15export default Quiz
Info
Javascript array starts from index 0, so activeQuestion initial state is 0.
Step 03: Fetching Answers
In our quiz question file, each question contains answers too, that is an array so we can render all the answers using the javascript map function
1const Quiz = () => {
2  const [activeQuestion, setActiveQuestion] = useState(0)
3  const [selectedAnswer, setSelectedAnswer] = useState('')
4
5  const { questions } = quiz
6  // destructuring
7  const { question, choices } = questions[activeQuestion]
8
9  return (
10    <div>
11      <h1>Quiz</h1>
12      <h2>{question}</h2>
13      <ul>
14        {choices.map((item) => (
15          <li>{item}</li>
16        ))}
17      </ul>
18    </div>
19  )
20}
Step 04: Moving To The Next Question
On clicking the next button we will evaluate the following things:
- Adding one to
activeQuestion(to move to the next question) - To check if the selected answer is right or wrong.
- Based on selected answer, we are updating the result screen, adding score to the result state, no. of right and wrong answers.
1const Quiz = () => {
2  const [activeQuestion, setActiveQuestion] = useState(0)
3  const [selectedAnswer, setSelectedAnswer] = useState('')
4
5  const onClickNext = () => {
6    setActiveQuestion((prev) => prev + 1)
7  }
8
9  const { questions } = quiz
10  const { question, choices } = questions[activeQuestion]
11
12  return (
13    <div>
14      <h1>Quiz</h1>
15      <h2>{question}</h2>
16      <ul>
17        {choices.map((item) => (
18          <li>{item}</li>
19        ))}
20      </ul>
21      <button onClick={onClickNext}>Next</button>
22    </div>
23  )
24}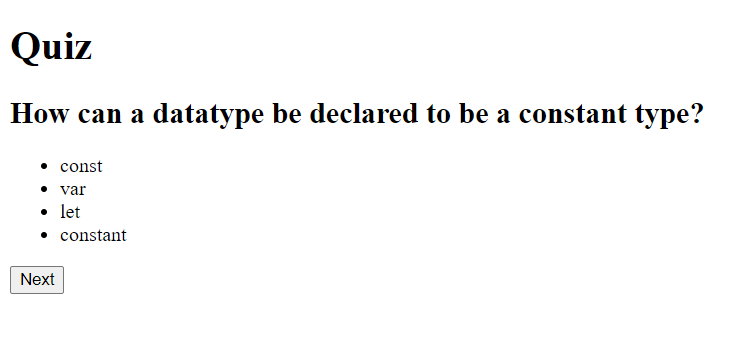
We haven’t added any styling yet.
onClickNext function we calculate the user score on basis of selected answer.
The use of the onClickNext method is noticeable in the code. Depending on the selected answer determines the user's score. The score will increase by 5, and the number of right answers will increase by one if the chosen option is accurate. If not, it will leave the outcome unchanged and add one to the incorrect responses.
1const onClickNext = () => {
2  setActiveQuestion((prev) => prev + 1)
3  setResult((prev) =>
4    selectedAnswer
5      ? {
6          ...prev,
7          score: prev.score + 5,
8          correctAnswers: prev.correctAnswers + 1,
9        }
10      : { ...prev, wrongAnswers: prev.wrongAnswers + 1 },
11  )
12}
Logic For Selected Answer
As we have discussed above our Javascript questions file contains the answers too for each question.
When the user selects the answer, we will match if the selected answer matches the answer given in question file.
1const onAnswerSelected = (answer) => {
2  if (answer === correctAnswer) {
3    setSelectedAnswer(true)
4    console.log('right')
5  } else {
6    setSelectedAnswer(false)
7    console.log('wrong')
8  }
9}
10
11return (
12  <div className="quiz-container">
13    <h1>Quiz</h1>
14    <h2>{question}</h2>
15    <ul>
16      {choices.map((answer) => (
17        <li onClick={() => onAnswerSelected(answer)} key={answer}>
18          {answer}
19        </li>
20      ))}
21    </ul>
22    <button onClick={onClickNext}>Next</button>
23  </div>
24)
This is what our UI looks like so far but some ingredients are still missing.
Step 05: Performance And UX Improvements
a. We want to highlight the selected answer by changing its UI.
b. In case of last question, we will show Finish as button text instead of Next.
c. Disable the next button if answer is not selected.
d. Adding 0 before question counter on top.
Let's implement them one by one.
a. Highlight the selected answer color
In the above result, you may have noticed we are not having any visuals for selected answer. Let's add this.
For this we have added another state selectedAnswerIndex, so highlight only selected answer.
1const [selectedAnswerIndex, setSelectedAnswerIndex] = useState(null)
2
3const onAnswerSelected = (answer, index) => {
4  setSelectedAnswerIndex(index)
5  if (answer === correctAnswer) {
6    setSelectedAnswer(true)
7  } else {
8    setSelectedAnswer(false)
9  }
10}1<ul>
2 {choices.map((answer, index) => (
3 <li
4 onClick={() => onAnswerSelected(answer, index)}
5 key={answer}
6 className={selectedAnswerIndex === index ? 'selected-answer' : null}
7 >
8 {answer}
9 </li>
10 ))}
11</ul>CSS
1.quiz-container ul .selected-answer {
2  background: #ffd6ff;
3  border: 1px solid #800080;
4}
b. Change button title if it is last question
In case of last question change button title to Finish from Next.
1<button onClick={onClickNext}>{activeQuestion === questions.length - 1 ? 'Finish' : 'Next'}</button>c. Disable Next button if answer is not selected
if selectedAnswerIndex is null, means user haven’t clicked any answer, button will be disabled.
1<button onClick={onClickNext} disabled={selectedAnswerIndex === null}>
2  {activeQuestion === questions.length - 1 ? 'Finish' : 'Next'}
3</button>
d. Add leading zero
Add a 0 to the question number less than 10.
1const addLeadingZero = (number) => (number > 9 ? number : `0${number}`)Now UI and UX are so much improved.
Code Uptill now
1import { useState } from 'react'
2import { quiz } from '../../data/questions'
3import './quiz.css'
4
5const Quiz = () => {
6  const [activeQuestion, setActiveQuestion] = useState(0)
7  const [selectedAnswer, setSelectedAnswer] = useState('')
8  const [selectedAnswerIndex, setSelectedAnswerIndex] = useState(null)
9  const [result, setResult] = useState({
10    score: 0,
11    correctAnswers: 0,
12    wrongAnswers: 0,
13  })
14
15  const { questions } = quiz
16  const { question, choices, correctAnswer } = questions[activeQuestion]
17
18  const onClickNext = () => {
19    // again reset the selectedAnwerIndex, so it won't effect next question
20    setSelectedAnswerIndex(null)
21    setActiveQuestion((prev) => prev + 1)
22    setResult((prev) =>
23      selectedAnswer
24        ? {
25            ...prev,
26            score: prev.score + 5,
27            correctAnswers: prev.correctAnswers + 1,
28          }
29        : { ...prev, wrongAnswers: prev.wrongAnswers + 1 },
30    )
31  }
32
33  const onAnswerSelected = (answer, index) => {
34    setSelectedAnswerIndex(index)
35    if (answer === correctAnswer) {
36      setSelectedAnswer(true)
37    } else {
38      setSelectedAnswer(false)
39    }
40  }
41
42  const addLeadingZero = (number) => (number > 9 ? number : `0${number}`)
43
44  return (
45    <div className="quiz-container">
46      <div>
47        <span className="active-question-no">{addLeadingZero(activeQuestion + 1)}</span>
48        <span className="total-question">/{addLeadingZero(questions.length)}</span>
49      </div>
50      <h2>{question}</h2>
51      <ul>
52        {choices.map((answer, index) => (
53          <li
54            onClick={() => onAnswerSelected(answer, index)}
55            key={answer}
56            className={selectedAnswerIndex === index ? 'selected-answer' : null}
57          >
58            {answer}
59          </li>
60        ))}
61      </ul>
62      <div className="flex-right">
63        <button onClick={onClickNext} disabled={selectedAnswerIndex === null}>
64          {activeQuestion === questions.length - 1 ? 'Finish' : 'Next'}
65        </button>
66      </div>
67    </div>
68  )
69}
70
71export default Quiz
Now we are all set to show the result component
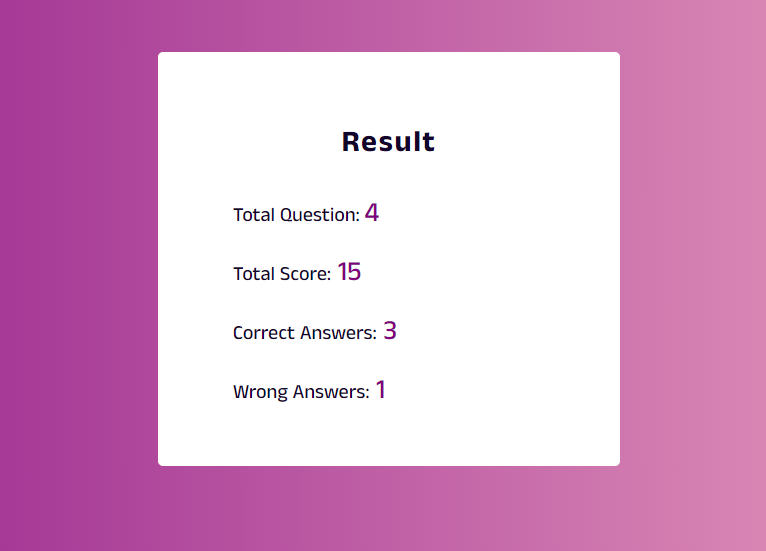
Step 06: Result Screen
The result screen will actually a condition based, as soon all the questions finish we will show the result component.
In result screen, we want to show 4 things,
- No. of questions
- Total Score we get
- How many questions were correct
- How many questions were wrong
First of all, we will define a showResult state, that will be false initially.
1const Quiz = () => {
2  const [activeQuestion, setActiveQuestion] = useState(0)
3  const [selectedAnswer, setSelectedAnswer] = useState('')
4  const [showResult, setShowResult] = useState(false)
5  const [selectedAnswerIndex, setSelectedAnswerIndex] = useState(null)
6  .....
7  .....
Logic to show the result
When all the questions will be finished showResult will become true.
Then we wrote a logic in jsx if showResult is true, show the result in quiz-container otherwise quiz questions.
1return (
2    <div className="quiz-container">
3      {!showResult ? (
4        <div>
5          .... {/* quiz question logic */}
6        </div>
7      ) : (
8        <div className="result">
9          <h3>Result</h3>
10          <p>
11            Total Question: <span>{questions.length}</span>
12          </p>
13          <p>
14            Total Score:<span> {result.score}</span>
15          </p>
16          <p>
17            Correct Answers:<span> {result.correctAnswers}</span>
18          </p>
19          <p>
20            Wrong Answers:<span> {result.wrongAnswers}</span>
21          </p>
22        </div>
23      )}
24    </div>
25  )
26}
We also added a condition on onClickNext function.
1const onClickNext = () => {
2  setSelectedAnswerIndex(null)
3  setResult((prev) =>
4    selectedAnswer
5      ? {
6          ...prev,
7          score: prev.score + 5,
8          correctAnswers: prev.correctAnswers + 1,
9        }
10      : { ...prev, wrongAnswers: prev.wrongAnswers + 1 },
11  )
12  if (activeQuestion !== questions.length - 1) {
13    setActiveQuestion((prev) => prev + 1)
14  } else {
15    setActiveQuestion(0)
16    setShowResult(true)
17  }
18}
Here we are saying when activeQuestion !== questions.length - 1 means it is not the last question, add one to activeQuestion if it is last question showResult will be true.
if you like you can move result jsx to a separate component and pass data via props.
This is how our result component UI will look like.
Complete Component of Reactjs Quiz App
1import { useState } from 'react'
2import { quiz } from '../../data/questions'
3import './quiz.css'
4
5const Quiz = () => {
6  const [activeQuestion, setActiveQuestion] = useState(0)
7  const [selectedAnswer, setSelectedAnswer] = useState('')
8  const [showResult, setShowResult] = useState(false)
9  const [selectedAnswerIndex, setSelectedAnswerIndex] = useState(null)
10  const [result, setResult] = useState({
11    score: 0,
12    correctAnswers: 0,
13    wrongAnswers: 0,
14  })
15
16  const { questions } = quiz
17  const { question, choices, correctAnswer } = questions[activeQuestion]
18
19  const onClickNext = () => {
20    setSelectedAnswerIndex(null)
21    setResult((prev) =>
22      selectedAnswer
23        ? {
24            ...prev,
25            score: prev.score + 5,
26            correctAnswers: prev.correctAnswers + 1,
27          }
28        : { ...prev, wrongAnswers: prev.wrongAnswers + 1 },
29    )
30    if (activeQuestion !== questions.length - 1) {
31      setActiveQuestion((prev) => prev + 1)
32    } else {
33      setActiveQuestion(0)
34      setShowResult(true)
35    }
36  }
37
38  const onAnswerSelected = (answer, index) => {
39    setSelectedAnswerIndex(index)
40    if (answer === correctAnswer) {
41      setSelectedAnswer(true)
42    } else {
43      setSelectedAnswer(false)
44    }
45  }
46
47  const addLeadingZero = (number) => (number > 9 ? number : `0${number}`)
48
49  return (
50    <div className="quiz-container">
51      {!showResult ? (
52        <div>
53          <div>
54            <span className="active-question-no">{addLeadingZero(activeQuestion + 1)}</span>
55            <span className="total-question">/{addLeadingZero(questions.length)}</span>
56          </div>
57          <h2>{question}</h2>
58          <ul>
59            {choices.map((answer, index) => (
60              <li
61                onClick={() => onAnswerSelected(answer, index)}
62                key={answer}
63                className={selectedAnswerIndex === index ? 'selected-answer' : null}
64              >
65                {answer}
66              </li>
67            ))}
68          </ul>
69          <div className="flex-right">
70            <button onClick={onClickNext} disabled={selectedAnswerIndex === null}>
71              {activeQuestion === questions.length - 1 ? 'Finish' : 'Next'}
72            </button>
73          </div>
74        </div>
75      ) : (
76        <div className="result">
77          <h3>Result</h3>
78          <p>
79            Total Question: <span>{questions.length}</span>
80          </p>
81          <p>
82            Total Score:<span> {result.score}</span>
83          </p>
84          <p>
85            Correct Answers:<span> {result.correctAnswers}</span>
86          </p>
87          <p>
88            Wrong Answers:<span> {result.wrongAnswers}</span>
89          </p>
90        </div>
91      )}
92    </div>
93  )
94}
95
96export default Quiz
CSS
1@import url('https://fonts.googleapis.com/css2?family=Anek+Malayalam:wght@100;200;300;400;500;600;700;800&display=swap');
2
3body {
4  font-family: 'Anek Malayalam', sans-serif;
5  background: linear-gradient(90.04deg, #800080 0.03%, #ffc0cb 99.96%);
6  color: #11052c;
7  display: flex;
8  justify-content: center;
9  margin: 0;
10  padding: 0 30px;
11}
12
13.quiz-container {
14  max-width: 500px;
15  min-width: 250px;
16  background: #ffffff;
17  border-radius: 4px;
18  margin-top: 100px;
19  padding: 30px 60px;
20}
21
22.quiz-container .active-question-no {
23  font-size: 32px;
24  font-weight: 500;
25  color: #800080;
26}
27
28.quiz-container .total-question {
29  font-size: 16px;
30  font-weight: 500;
31  color: #e0dee3;
32}
33
34.quiz-container h2 {
35  font-size: 20px;
36  font-weight: 500;
37  margin: 0;
38}
39
40.quiz-container ul {
41  margin-top: 20px;
42  margin-left: -40px;
43}
44
45.quiz-container ul li {
46  text-decoration: none;
47  list-style: none;
48  color: #2d264b;
49  font-size: 16px;
50  background: #ffffff;
51  border: 1px solid #eaeaea;
52  border-radius: 16px;
53  padding: 11px;
54  margin-top: 15px;
55  cursor: pointer;
56}
57
58.quiz-container ul .selected-answer {
59  background: #ffd6ff;
60  border: 1px solid #800080;
61}
62
63.quiz-container button {
64  background: linear-gradient(90.04deg, #800080 0.03%, #ffc0cb 99.96%);
65  border-radius: 9px;
66  font-size: 18px;
67  color: #ffffff;
68  padding: 10px 42px;
69  outline: none;
70  border: none;
71  cursor: pointer;
72  margin-top: 15px;
73}
74
75.quiz-container button:disabled {
76  background: #e7e8e9;
77  color: #9fa3a9;
78  cursor: not-allowed;
79}
80
81.flex-right {
82  display: flex;
83  justify-content: flex-end;
84}
85
86.result h3 {
87  font-size: 24px;
88  letter-spacing: 1.4px;
89  text-align: center;
90}
91
92.result p {
93  font-size: 16px;
94  font-weight: 500;
95}
96
97.result p span {
98  color: #800080;
99  font-size: 22px;
100}
Apply What You've Learned
This quiz app is missing a timer. You can improve this quiz app by adding a timer. However, I would suggest adding a timer with a twist.
For example, for each question the user will have 7 seconds to answer. If they fail to respond within 7 seconds, the app would automatically proceed to the next question.
Read more details of 7 Second Quiz Challenge to practice what you have learned.
React Quiz App Template
I've developed a Quiz App Template called "Xeven Quiz" to help you get started. This template is designed with ReactJS, Typescript and Styled Components that offers various question types, including Multiple Choice Questions (MCQs), Multiple Answer Questions (MAQs), and True/False questions.
With Xeven Quiz, users can easily take the quiz and see their results. The result screen shows how many questions the user attempted, how much they scored, how long it took, and whether they passed or failed.
In the result screen, users can see which questions they answered correctly and which ones were wrong. If the user provided a wrong answer, they can find the correct answer for that particular question.
To experience the Demo App, visit the link.
The React Quiz app template also has clear code documentation on GitHub. Feel free to check it out and use it as a starting point for your own quiz app project.
Codepen Demo | Reactjs Quiz App
Written by
Abdul Basit
Frontend developer passionate about JavaScript, React, and building great web experiences. Writing about web development to help developers level up their skills.
Continue reading